Congratulations!
Your hunt has ended successfully and you are standing over your quarry, enjoying those nearly indescribable emotions that you experience each and every time: joy, achievement, reverence, all the things that go with being a participant in nature’s grand scheme.
Now the work begins.
The main reasons why you should field dress game that you harvest is to protect the meat and take steps to prevent spoilage. Field dressing your harvested game can help keep it from going bad. It also helps in reducing weight loss, as well as preventing contamination of other food sources with bacteria or parasites.
Proper field care of any game animal is key to the full enjoyment of ethical hunting. Take care of the game and it will provide you and yours with great-tasting, nutritious sustenance for the months to come.
Before you hit the field, make sure you have a good quality sharp hunting knife, and a sharpening stone. A sharp knife is a key to quick, clean and safe field dressing.

Field Dressing Big Game
The following are step by step tips for field dressing were written for deer, but will work for most big game species.
- Always approach downed big game from behind, or from the uphill side. To make sure the animal has expired, prod firmly on a hindquarter or the eye. If the animal’s eyes are closed, there is a very good chance it has not yet died.
- To bleed or not to bleed? Some maintain it is best to situate the animal with its head downhill and cut the throat to “bleed it out.” This is usually not necessary, especially if you commence field dressing immediately. Of course, if you plan on a head and shoulder mount for the animal, do not cut the throat.
- Where should your first cut begin when field dressing a deer? Adjust the animal with its head uphill. Grab the hide at the base of the sternum and pull up. Insert the tip of your knife, blade up, and carefully cut the hide all the way down. Insert your fingers, and carefully cut down through the tissue until you can see the entrails.
- If you have a strong knife, try to locate the seam in the pelvis and break it, which allows you to easily remove the anus and genitals. Be sure to check your local game regulations, as some states require you leave proof of sex attached to the carcass. If you can’t break the pelvis, carefully cut around the anus with your knife. You need an extremely sharp knife to do this.
- Pull the anus and large intestine into the body cavity. Using your knife, with just a few quick cuts you can get through the thin tissue holding the entrails inside the cavity. Roll the animal on its side and simply roll intestines out.
- Field dressing is easier if you use a strong-bladed knife and cut through the brisket and up the neck to the chin. However, if you’re going for a shoulder mount, this will destroy the hide and you’ll have to make due with cramped conditions in the chest cavity.
- Reach up and cut the windpipe as far up the neck as you can reach. Grasp the windpipe (set your knife down first) and pull downward. This will remove everything from the diaphragm up.
- Cut completely around the diaphragm (a sheet-like piece of muscle under the lungs) and discard it.
- Grab the animal by the front legs or antlers (if the animal is of manageable size) and lift, which will drain the cavity of blood. Take a moment to check the remainder of the carcass for feces or innards, and remove as best you can.
- If you need to drag your animal some distance, it is best not to cut the throat (it will catch on literally everything) and best not to cut through the breastbone as it will make for a very dirty carcass.
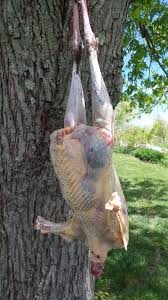
- Back at camp, or home, hang the carcass by the hind legs. Cut down the inside of each hind leg and skin around the legs to the tail bone. Also cut down the inside of the front legs. Grasp the tail firmly and pull; the hide should come off with little or no cutting down to the front legs. You may have to use your blade to get the skin off the front legs where it is attached most firmly.
- Skin down the neck as far as possible. If you are doing a head mount, remove the skull by cutting the neck meat and either using a saw or simply twisting the neck vertebra until it pops free.
- Trim as much fat off the carcass as possible. Use a wet rag and wipe the carcass down completely, inside and out, removing blood and hair. Go over again with a dry rag, again inside and out.
- Wild game is best when allowed to hang at least five days, up to 10 days, in a cool, dry place. If you do not have access to a cooler and live in a warmer climate, try setting up a fan at full blast, adjusting it around the hanging carcass.
- Check on the hanging animal at least once a day. As it cures, the meat will darken and develop a kind of crust around the outside. This is normal. Curing is good for the meat, and the meat itself will firm up, making it easier to butcher.
Cutting your own: Complete the cycle.
Many folks take their wild game to meat processors for “professional” butchering. But butchering your own keeps you in the “field-to-the-table” cycle. Besides, it’s fun and allows you to get everything you possibly can out of your animal.

Start by removing the front shoulders. Simply find the seams between the muscles, and separate the various muscle groups. When cutting steaks, take a section, find the grain, and cut against it: in other words, perpendicular to the natural grain of the meat. The lower front legs need to be trimmed thoroughly, and are best used for canning, grinding or sausage meat.
Next, remove the back straps. These are the muscles that run along the spine. They are very easily removed simply by running a sharp knife along each side of the back bone, then fleshing the straps off the rib cage. Again, cut against the grain. These are among the choicest cuts on any big game animal.
At the hind quarters, make a cut around the leg just above the knee joint. Flesh around the thigh bone, down to the pelvis, and the whole shooting match will come off in one big chunk. Lay it flat, find the seams, and separate, then cut into steaks or leave as roasts. The lower legs, again, are best for sausage, burger or canning.
As you cut steaks, trim the crust at the outer edges, and remove as much fat and sinew as possible. This cuts down on the “wild” flavor.
Inside the rib cage, along the spine, are two smaller strips of meat. This is the tenderloin. These should be removed no more than a day or two after the carcass is hung, as they are small and can dry beyond use quickly. These are probably the most tender tidbits on deer, elk and most of the others.
Once you’ve got your steaks and roasts separated, take a serving size full (which will be different depending on how many you feed at a time) and wrap in plastic wrap tightly, squeezing the air out as you roll. Then take butcher paper, wax side up, and wrap tightly, securing with freezer tape. Write the species and year of kill on the wrapper, and these will stay frozen just fine for a year or more.
Transporting Big Game
The days of tying your big game animal to the fender of your car or the hood of your truck are over, thank goodness. For practical reasons, it is a terrible place to transport your game, as heat from the engine compartment can do some major damage to the meat. For ethical reasons, it’s a horrible idea.
A big game animal sprawled over the hood of your vehicle looks disrespectable, like you’re grandstanding, showing off your victory over nature.
The bed of your pickup, the rear of your SUV, even the trunk of your car, are preferable. It’s a good idea to have a game bag or a large section of cheese cloth on hand to cover the carcass, especially once skinned, to keep bugs and dirt and other icky stuff off the meat.
The key is to keep the carcass cool, dry and in a dignified posture until you get it home.
Field Dressing Game Birds
For wingshooters, where often times regulations require you leave a wing attached or some other form of identification, the temptation to just take the entire bird home and do it all there is constant.
However, you can quickly field dress most birds while leaving most of it intact.
It’s simply, really. For avoidance of doubt, use the following in field dressing upland game birds.
Make a small slit through the thin skin below the breast down to the legs. Reach up and dig it out. Try to be sure to get the craw out as well, as a lot of nasty stuff that could taint the meat tends to hang up in there. The craw is simply the pouch in the upper body where food is mixed with grit to aid in digestion.
Preparing a bird for the table can be a bit more complicated, depending on what you want. For grouse and similar birds, you can simply skin around the breast and legs and remove them. Ditto for anything where you do not need to keep the skin attached.
Pheasants and most upland birds are pretty easy to pluck, it just takes time and a little patience.
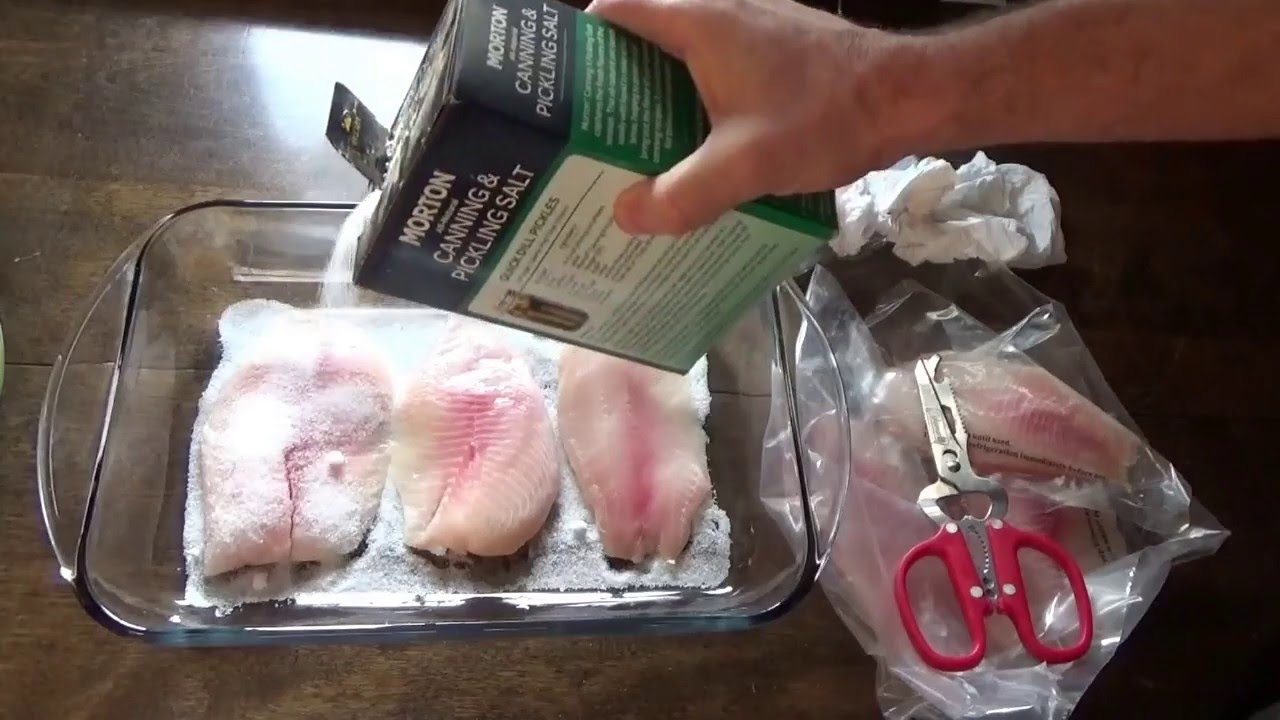
Once you’ve got the bird skinned or plucked, it’s not a bad idea to soak it overnight in cold salt water. After that, rinse it off, pat it dry, and you’re ready to cook or freeze.
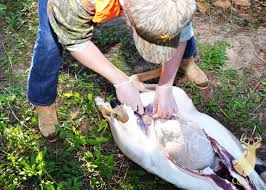
Field Dressing Waterfowls

As with upland birds, it’s a good idea to simply make a small cut and scoop them out right in the field, allowing them to cool right off the bat.
Since there are very strict regulations governing the number of mallards, pintails, etc., one may have in a bag limit, this is as far as you want to go in field dressing waterfowl so officials can make identifications easily in the field.
Also see our section- Snow Goose Hunting Tips-How to Hunt Snow Geese Like a Pro
The messy part is plucking. Pluck as many feathers off the carcass as you can. You’re going to be stuck with pinfeathers and down, which can be removed by dipping the birds in a paraffin/water mixture.
Use two cakes of paraffin for four quarts of water, bring to a boil, then dip birds into mixture one at a time. After the birds cool, you can simply use a dull knife to scrape the remaining feathers off the bird. Wipe out the cavity with paper towels, and hang the carcass to allow for air-drying.
Transporting birds
Again, it is important, especially with waterfowl but really for all other species, not to pluck the birds before you get them home and are ready for processing. Most states say you have to leave a head or wing attached, but it’s OK to leave them intact save the innards.
Do not pile warm birds on top of each other. When possible, hang them from your belt or blind, separated from one another. Put them on ice as soon as possible. Birds, more so than big game, is very delicate and will spoil quickly if not kept cool.
Safety Tip
First things first, make sure you have the right tools for the job. Forget about contouring brushes; you’ll need a sharp hunting knife, and it better be sharp enough to slice through your dreams of becoming a vegetarian. Keep those fingers well away from the blade unless you want to see what your insides look like.
Remember
The whole idea of why you should field dress harvested game is the removal of anything within the animal that might spoil the meat if left too long. The key is doing the very best you can while in the field.
There are times when the situation doesn’t allow you time to do as thorough a job as you would like. At these times, get out the “big chunks,” get the animal out of the field, and as quickly as possible complete the process.
This usually includes wiping down of the animal and completely removing the windpipe and anus.
Properly cared for wild game is among the most nutritious and delicious meat on the planet, made all the sweeter by the fact you took it yourself.alloutprodux.com
A Pro Remarks
The art of field dressing involves a bit of precision surgery. We’re not talking about open-heart surgery here, but close enough. You’ll need to carefully make an incision along the belly of the animal, kind of like giving it a fashionable belly button piercing. Then, with a mix of finesse and determination, you start scooping out the innards like you’re cleaning the nastiest room ever.
It’s a messy business, folks, and if you’re not careful, you might end up with an unplanned mud bath in the process. But hey, that’s all part of the adventure, right?
Now, remember, field dressing isn’t for everyone. It takes guts—literally and figuratively. But for those who dare venture into this wild world, the reward is a mouthwatering meal that will make your taste buds dance the tango.
So, next time you’re out in the wilderness, armed with nothing but your wit and a hunting knife, give field dressing a try. It’s like a survival reality show, except the only prize is a tasty dinner and some unforgettable memories. Happy hunting, brave souls!